Local Installation#
Installation#
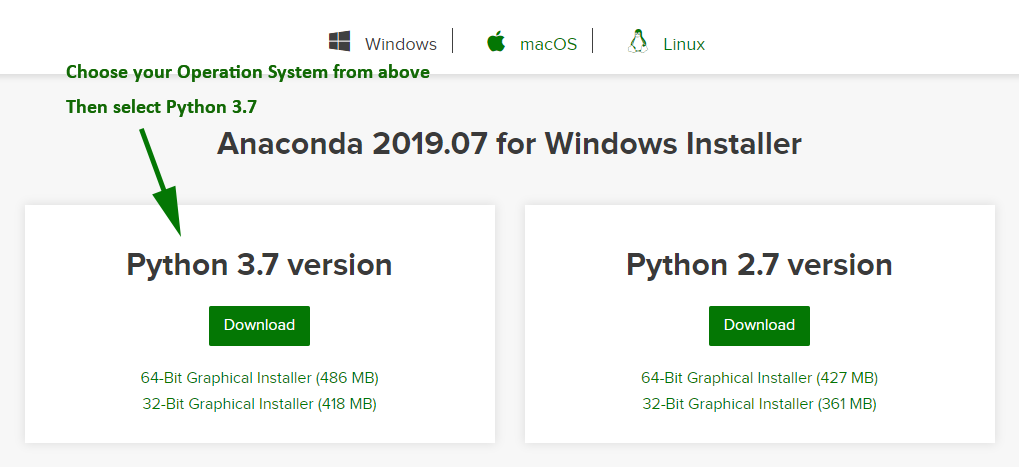
Visit continuum.io and download the Anaconda Python distribution for your operating system (Windows/Mac OS/Linux).
Be sure to download the Python 3.X (where X is some number greater than or equal to 8) version, not the 2.7 version.
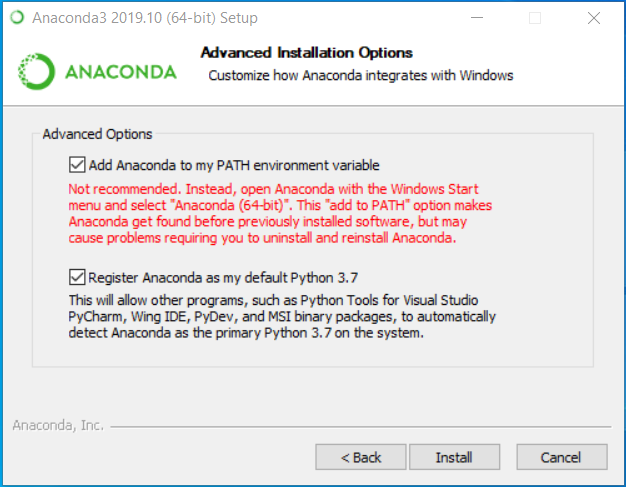
Make sure that during the installation Anaconda is added to your environment/path.
On Mac OS and Linux, this should happen by default.
For Windows users, we recommend installing for “just me” instead of “all users”. Windows users will need to check the upper box when the page shown below appears (disregard the “not recommended” warning from Anaconda).
Downloading the QuantEcon Data Science Lectures#
To download the QuantEcon Data Science lectures, go to its Github repo, click on the Code button.

You can download the lectures through either Github Desktop or Terminal:
Github Desktop (Mac/Windows only), recommended for most users.
Install Github Desktop.
Go to the Github repo.
Click the “Open with Github Desktop” option in the Code button menu. It should open a Github Desktop popup that looks like this:
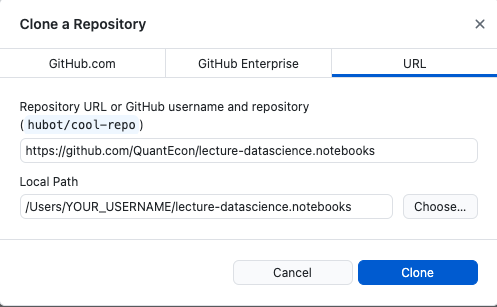
You should choose the path (folder) where you would like to download the repository. The default path on Windows should be
C:/Users/YOUR_USERNAME/Documents/GitHub.
Terminal
Make sure that
gitis installed on your computer. (gitis not installed on Windows by default. You can download and install it from here).Open a terminal.
Set the path to where you would like to download the lectures. The default one is your home directory.
Run
git clone https://github.com/QuantEcon/lecture-datascience.notebooks.gitwhich will download the repository with notebooks in your working directory.
Package Management#
In addition to Jupyter, the Anaconda Python distribution comes with two package management tools conda and pip.
These will help you ensure that you have the right packages (think of these as “add-ons” to Python that give you additional functionality… We will discuss these more in depth later!) and help you keep them all up to date.
We will work through an example below to install some new package functionality needed for some
later lectures. Generally, packages can be installed by using conda install <package name> or
pip install <package name>.
Please install the packages you will need later by following the instructions below for your computer’s operating system.
Linux/Mac
Open a terminal.
Run the following commands:
# Install Python packages
conda install python-graphviz
conda install -c conda-forge "nodejs>=10.0" xgboost
pip install fiona geopandas pyLDAvis gensim folium descartes pyarrow --upgrade

# Activate jlab extensions
jupyter labextension install @jupyterlab/toc  --no-build
jupyter labextension install @jupyter-widgets/jupyterlab-manager --no-build
jupyter labextension install plotlywidget --no-build
jupyter labextension install jupyterlab-plotly --no-build
jupyter lab build
Press
yand enter whenever you seeProceed [y]/nfrom your terminal.Close the terminal when the installation finishes.
Windows
Open a command prompt by pressing Windows + R to open the
runbox, typepowershell, and press Enter.Run the following commands in order:
# Install Python packages
conda install geopandas python-graphviz
conda install -c conda-forge nodejs
pip install pyLDAvis gensim folium xgboost descartes pyarrow graphviz --upgrade

# Activate jlab extensions
jupyter labextension install @jupyterlab/toc  --no-build
jupyter labextension install @jupyter-widgets/jupyterlab-manager --no-build
jupyter labextension install plotlywidget --no-build
jupyter labextension install jupyterlab-plotly --no-build
jupyter lab build
Press
yand enter whenever you seeProceed [y]/nfrom your terminal.Close the command window after the installation finishes, log out of Windows, and then log in.
If you are told that you are missing a package at any point in time, we recommend trying to install
the package with conda first and, if that doesn’t work, installing with pip.
You can update a package by running:
conda update <package name>for condapip install <package name> --upgradefor pip
Note: If you have errors using graphviz on Windows, then open a powershell terminal and execute the following two lines:
$pp = (python -c "import sys; print(sys.exec_prefix)")

Set-ItemProperty -path HKCU:\Environment\ -Name Path -Value "$((Get-ItemProperty -path HKCU:\Environment\ -Name Path).Path);$($pp)\Library\bin\graphviz"
Starting Jupyter#
Start JupyterLab by following these steps:
Open a new terminal (for Windows, you should use the Powershell: press Win + R and type
powershellin the run box, then hit enter).Type
jupyter laband press Enter.
If a web browser doesn’t open by default, look at the terminal text and find something that looks like:
Copy/paste this URL into your browser when you connect for the first time,
to login with a token:
    http://localhost:8888/?token=9a39d3741a4f0b200c6e4b07d8e5c04a089899cddc72e7f8
and copy/paste the line starting with http:// into your web browser.
Note
The terminal you opened must stay open while you are editing the notebooks.
Opening a Jupyter Notebook#
Once the web browser is open, you should see the JupyterLab dashboard. You can open a new Jupyter notebook by clicking Python 3 when you see something like the following image in your browser:
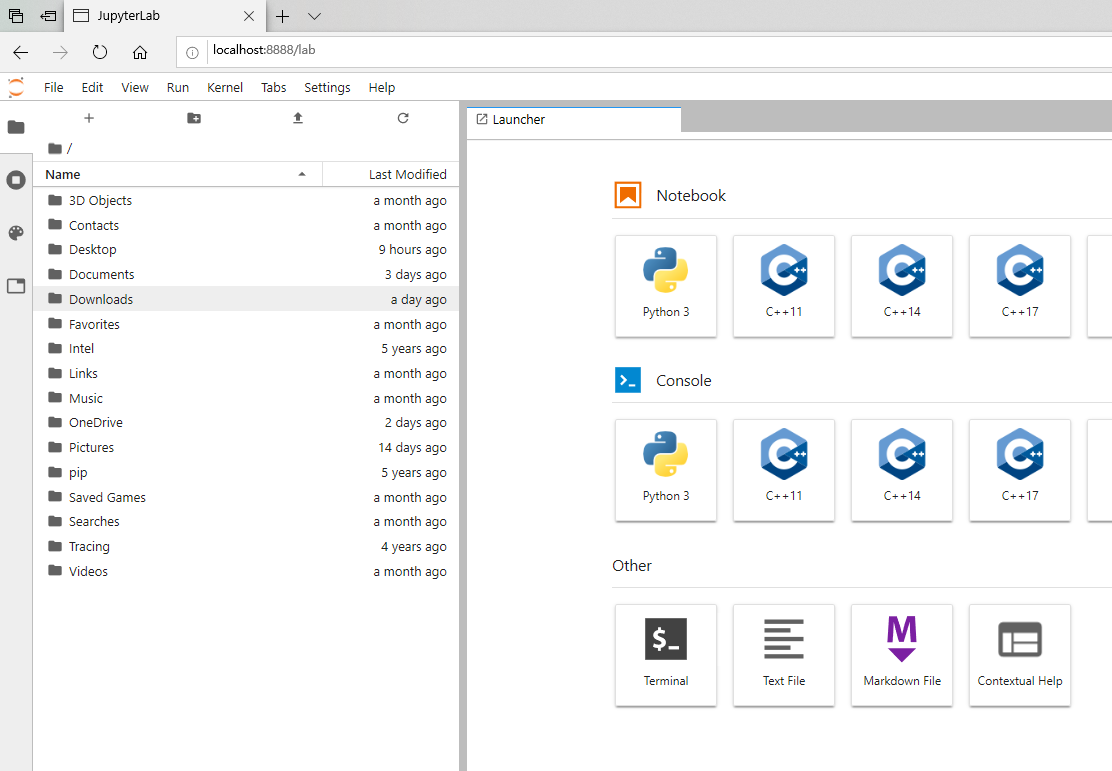
Once the notebook is open, you should something similar to the following image:
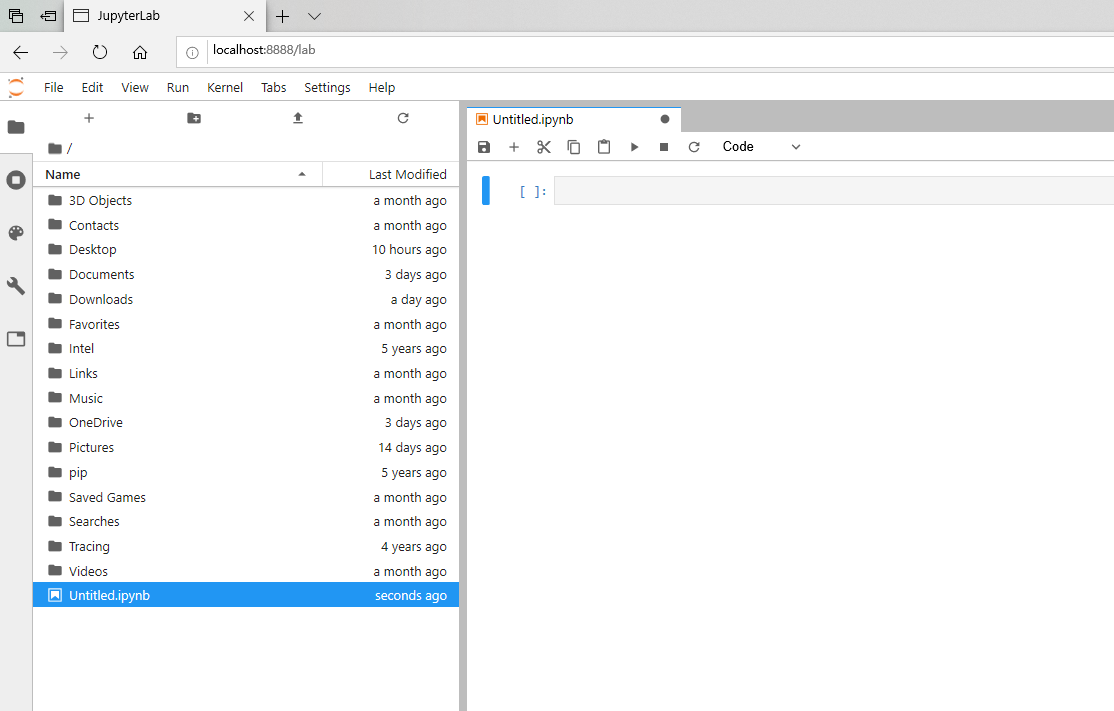
Note that:
The filenames on the left will be different.
It should list the contents of your personal home directory (folder).
Exercise
See exercise 1 in the exercise list.
Exercises#
Exercise 1#
Open this file in Jupyter by navigating to the QuantEcon Data Science folder that we downloaded
earlier, then click on the introduction folder, and select the getting_started.ipynb file.